Friday, April 14, 2017

Caped Crusaders Planner Pages

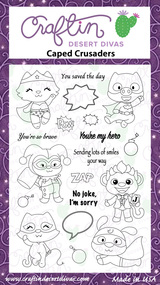
Hello everyone and Happy Friday!!! DT Member Jana from CHB Creations, stopping by today to bring you the Daily Post. I am in LOVE with the Caped Crusaders Stamp Set that was released last month. My son is a huge super hero fan and loves Batman, so I knew I had to get this set and use it on a planner layout.


Is this not totally adorable!!!!! I love that this set comes with so many different characters to choose from. 


And the additional Digital Stamps that were also released just help make the set complete.


These stamps and digi's are perfect for planner pages and many other projects. I know that I will be getting good use out of them all and already have many cards and other projects in the works.

A complete list of the CDD Products I used to create these planner pages are listed below:


I hope that you enjoyed today's Daily Post. Make sure that you stop by again tomorrow for more project ideas and inspiration from our talented Design Team members.

Have a fabulously crafty day!!!


Scrapper's Delights Inspirational Planner Event

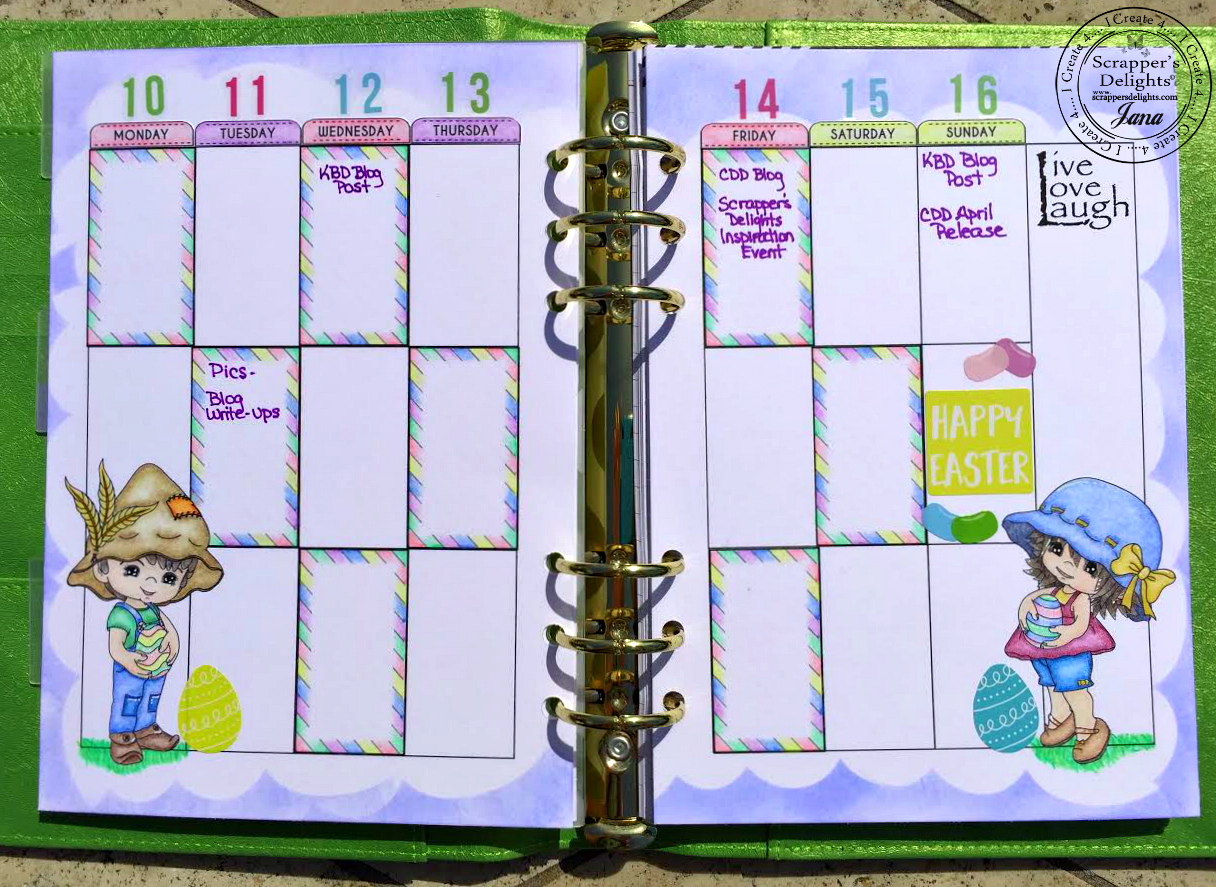
Hello everyone and Happy Friday!!!! I am so very excited to share with you all that I am one of the newest members of the Scrapper's Delights Planner Design Team. I can't wait to share all of the fabulous planner projects that we have lined up for you. Today is the launch of the Inspiration Event and I have created a weekly planner spread to share with you all.


This spread was created using the "A5 My Basic Planner 1".  These planner kits are loaded with so many different layouts and options, which makes it perfect for personalizing your planner to fit your needs.


The days of the week (Monday - Sunday) came from the "My Planner Giraffe Kit" (another super adorable planner kit with tons of options for planning and decorating your planner). For my patterned boxes, I used the "A5 Monthly Print Sheet 11a", which can be found in the A5 My Basic Planner 1 Kit. I wanted to create the month of April with an Easter theme, so the digi's I used are the "Easter Babies 1" (Girl) and "Easter Babies 2" (Boy).


I colored my Easter Babies digi's and the patterned boxes with Prismacolor Premier Colored Pencils (currently my absolute favorite coloring medium). I used some Easter stickers from ReCollections that I had in my stash to help decorate my spread too. The dates up top, are also stickers from me & my BIG Ideas, which again I had in my stash. For the cloud border surrounding my spread, I used Tim Holtz Distress Ink along with a cloud die cut.

Below is a list of supplies and products used to created this Easter Spread:


Prismacolor Premier Colored Pencils
Number Stickers - me & my BIG Ideas
Easter Stickers - ReCollections Sticker Book
Tim Holtz Distress Ink - Shaded Lilac
White Gel Pen

I hope that you enjoyed viewing my first Design Team Inspiration Project for Scrapper's Delights and will come back and visit again for more inspiration and project ideas. 

Thank you so much for visiting and 
Have a Fabulously Crafty Day!!!


Wednesday, April 12, 2017

Happy Easter, Easter Bunny!!!

Hello everyone and Happy Wednesday!! We are half way through the week and Easter is fast approaching. Today I am sharing an Easter card I created using the Eggie Buddies Bunny file from KaDoodle Bug Designs.


I just love this sweet bunny!! I started off by uploading the svg file to Cricut Design Space and re-sized my image. I used my Cricut Explore Air 2 to cut out all of the pieces and used the writing feature to write "Happy Easter" on one of the pieces decorating my Easter egg.

After all pieces were cut, I inked each piece using Tim Holtz Distress Inks and adhered them all together using Art Glitter Glue.

I wanted to decorate my Easter Egg a bit more, so I decided I wanted to add some pretty ribbon from ReCollections that I had in my stash. I also added some Nuvo Crystal Drops to the ribbon as well to give it more color and interest.

I then adhered my finished bunny to my A2 sized card and added some more Nuvo Crystal Drops to the corners for even more dimension and interest.

Below is a complete list of supplies I used to create this card:


Bazzill Card Stock

Tim Holtz Distress Inks: Pumice Stone, Spun Sugar, Cracked Pistachio

Art Glitter Glue

ReCollections Ribbon

Pebbles Pearlescent Chalks - Shimmer Shades


Nuvo Crystal Drops: Apple Green, Bubblegum Blush


I hope you enjoyed today's project. 
Have a fabulously crafty day!!!

Monday, April 3, 2017

Sweet Spring Planner Spread...

 Hello everyone and Happy Monday!! Today I am stopping in to share a "Sweet Spring" weekly planner spread that I created in my Happy Planner which was inspired by the new April Moodboard Social Media Challenge over at Craftin Desert Divas #cddmonthly.


I just adore the color combination of pinks and greens and decided that it would be perfect for this weeks spread.  Craftin Desert Diva's also has some super sweet Lamb digi stamps. I knew I had to grab those and add them to this layout.


 I colored all of my digital images using Prismacolor Premier Colored Pencils and added a small amount of Wink of Stella as accents to all of the flowers on the digi stamps. To create my dates, I used the flower dies from the Crazy Stitched Frames die set and stamped the dates onto the center of each flower.  


 These digi stamps also come with some sweet sentiments, which of course I had to add to my planner as well. I printed them out and used the Flag Banner Dies to cut them. I inked the edge of each banner using Tim Holtz Distress Ink to make it pop just a tiny bit. 

I love how sweet this spread turned out and I still have plenty of room to fill in my plans and appointments for the week.

Below is a complete list of all the supplies I used to create this spread:

ReCollections Washi Tape
Prismacolor Premier Colored Pencils
Memento Ink
Tim Holtz Distress Ink
Wink of Stella Brush - Gl. Clear 999
Xyron Tape Runner


I hope that you enjoyed today's project share. 
Thank you for stopping by and have a Fabulously Crafty Day!!!


Wednesday, March 29, 2017

Welcome Spring....

Hello crafty friends!! Stopping in today to share a sweet Spring layout I created using the adorable "Spring Cow" file from KaDoodle Bug Designs.


This file is just darling and I have been wanting to use it for sometime now, and with Spring here I thought it would fit perfectly on a lovely Spring themed layout. I started by uploading the file to Cricut Design Space and cut out my pieces using my Cricut Explore Air 2. I then inked all of my pieces using Tim Holtz Distress Inks and adhered them together using Art Glitter Glue.

I used my Fancy Frames Dies from Craftin Desert Divas to cut out the three photo mats. I also used my paper trimmer to cut 1/4" strips of patterned paper to create a border around my page. 


I wanted a simple title and went with "Welcome Spring". I cut these letters out using my Cricut Explore Air 2. I adhered them onto one of the photo mats I had cut and added some stickles here and there for some added interest.


In addition, I also added some Stickles to parts of the grass, flower leaves and stems and also on the bumble bees wings. I added small drops of Nuvo Crystal Drops in the center of each of my flowers as well. And to finish it off, I added a small rhinestone gem to the bows on the cow and the flower pot. 


Below is a complete list of the supplies used to create this Spring layout:


KaDoodle Bug Designs File: Spring Cow

ReCollections Cardstock

Bazzill Cardstock

DCWV Painted Petals Cardstock Stack


 Craftin Desert Divas - Fancy Frames Dies

Tim Holtz Distress Inks

Art Glitter Glue

White Gel Pen

Stickles: Firefly & Ice


 Nuvo Crystal Drops: Bubblegum Blush & Sugared Almond

Rhinestone Adhesive Gems


Thank you for visiting today and I hope that you enjoyed my project.

Have a fabulously crafty day!!!


Wednesday, March 22, 2017

Smiles.....

Good morning & Happy Wednesday!! Stopping by today to share a planner spread that I created in my mini HP using the super adorable "Face Expressions" file from KaDoodle Bug Designs.


I thought this file was super cute and perfect to add to a planner spread without making the pages seem too bulky.  All of my emoji faces were cut using Bazzill Cardstock on my Cricut Explore Air 2. Each piece was inked with Tim Holtz Distress Inks and adhered together using Art Glitter Glue.

I had some fun emoji washi tape in my stash, so of course I had to add it as it goes perfectly with the theme. I added a few small planner stickers from ReCollections and am now ready to fill up my week.

Below is a complete list of the supplies used to create this planner spread:


Bazzill Cardstock
Tim Holtz Distress Inks: Scattered Straw, Faded Jeans, Fired Brick
Art Glitter Glue
White Gel Pen
Craft Smith - Emoji Washi Tape
Happy Planner Mini
ReCollections Creative Year Stickers


I hope that you all enjoyed my planner creation for today.  And as always,
Have a Fabulously Crafty Day!!!


Sunday, March 19, 2017

Have a Beautiful Day!

Hello everyone! Today I am stopping by to bring you a super sweet planner dashboard along with two fun spring time planner clips created with goodies from Craftin Desert Divas. 


With all of the cold Winter weather and storms we've been having lately here in New York, I can't wait for the arrival of Spring. I used the "Beautiful Day" digital stamp for my dashboard. I used the beautiful tree as my main focal point and took the sentiment, "Have a Beautiful Day", copied it and placed it as a border on each side of my tree.  Because I did not like all of the white space surrounding my image, I used a polka dot stencil and distress inks to create a soft border.


I colored up the tree using Prismacolor Premier Colored Pencils. To give my tree a bit of life and interest, I added a small drop of Nuvo Crystal Drops in the center of each flower. I also added a tiny amount of Stickles to a few of the smaller leaves throughout the tree as well. 


And last but not least, I had to create some sweet spring time planner clips to match.  I used two of the smaller sized birds from the Feathered Friends Stamp Set. Once colored, I punched them out using a one inch hole punch, adhered them onto two bottle caps and added clear adhesive rounds to protect and finish them off.  I gathered some sheer, satin and lace ribbon from my stash and looped it through my gold jumbo paper clips and added the finished bottle cap.

Below is a list of all the products used to create these planner goodies:

Prismacolor Premier Colored Pencils
Heidi Swapp Polka Dot Stencil
Tim Holts Distress Inks: Shabby Shutters, Antique Linen, Victorian Velvet
 ReCollections 110lb White Cardstock 
Ranger Stickles - Green Firefly
Memento Tuxedo Black Ink
Bottle Caps
Clear Adhesive Acrylic Rounds
ReCollections 1" Hole Punch
Gold Jumbo Paper Clips
Celebrate It - Satin, Sheer and Lace Ribbon


I hope that you enjoyed today's planner goodies as much as I enjoyed creating them!
Have a Beautiful (and Fabulously Crafty) Day!!!